A car show display board is your vehicle’s personal storyteller. It turns a cool car into a showstopper. In just a few glances, your display board should communicate what makes your car extraordinary.
Choose a Focal Point for Your Display
- Find the Core of Your Story: Every vehicle has a tale. Maybe it’s the first restoration, the last of its kind, or something your grandfather passed down. Find that emotional hook that will set your display apart from others.
- Emphasize Key Features: Whether it’s a unique paint job or a rare engine modification, hone in on that wow factor. Use that to guide everything else on your display board—it becomes your focal point.
How to Make a Car Show Display Board with the Right Materials
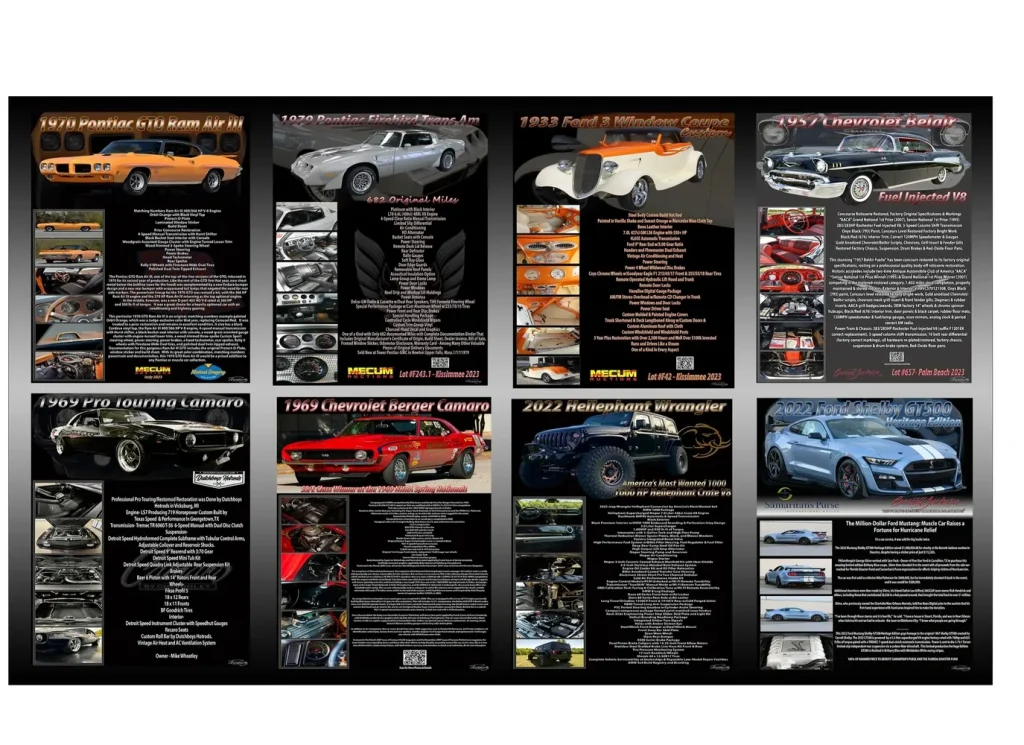
- Poster Board or Digital Signage: You have choices—a classic poster board or a slick digital signage display. While a poster board is tried and true, LCD displays offer dynamic options for top-tier shows.
- Quality Matters: Make sure to choose materials that are durable. Use sturdy materials like polished brass post stanchion posts to hold up your board. Your board’s durability can say a lot about the care and attention you put into your car.
- Weather Resistance: For outdoor displays, consider moisture-resistant or laminated materials so your display stands strong rain or shine.
Determine the Size of Your Car Show Display Board
- Ideal Height and Width: You want your display board to be readable even if someone is standing a few feet away. A typical size for car show display boards is 24×36 inches.
- Avoid Overwhelming Visitors: Too big, and it overpowers your vehicle; too small, and no one can read it. Strike a balance that is attention-grabbing without being overwhelming.
How to Make a Car Show Display Board with High-Quality Images
- Capture Cool Pictures: Nothing captures attention like cool pictures. Hire a professional photographer or take photos during the golden hour for the best results.
- Highlight Restoration: Include restoration pictures to showcase the journey of your beloved vehicle. People love seeing where it started and where it ended up.
- Picture Placement: Place images strategically on the board to balance text and visuals. Create a section for engine specs and custom car pictures to get eyes glued.
Use Clear and Concise Language
- Get to the Point: Use language that communicates your vehicle’s story quickly. People won’t spend more than a few minutes reading your board, so every word should count.
- Highlight Key Information: Break down complex facts into digestible pieces. Use bullet points for basic specs like horsepower, torque, and model lineage.
Avoid Overly Technical Jargon
- Simplify for the Audience: Most people at car shows aren’t mechanics. Simplify the language so that even a potential buyer or an interested teen can understand what makes your vehicle special.
- Glossary Section: If you must use jargon, include a glossary to explain terms in layman’s language.
Highlight Unique Features of Your Vehicle
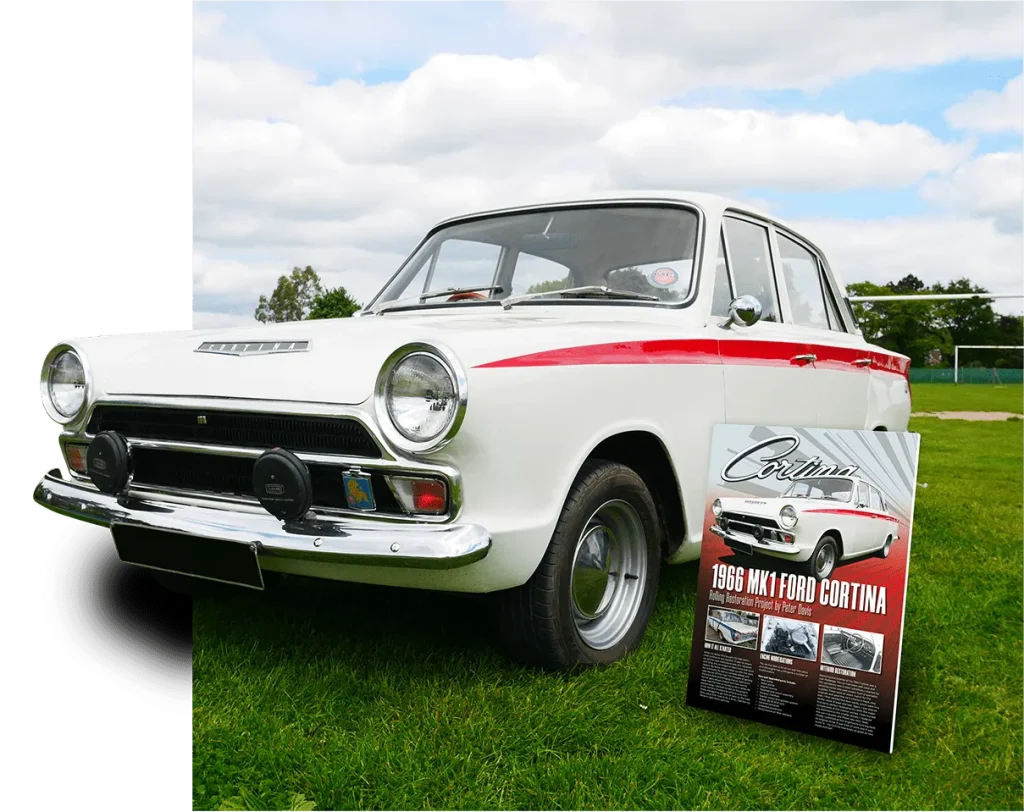
- Focus on the Special Elements: What sets your car apart from others in the show? Whether it’s rare previous owner history or a unique engine upgrade, make that a focal feature.
- Custom Parts: Use bullet points or a dedicated section to talk about custom parts and features that make your car unique—these are often the highlights for car enthusiasts.
How to Make a Car Show Display Board with a Balanced Layout
- The Golden Ratio: When organizing your board, aim for a balanced design. The golden ratio works wonders in making a layout pleasing to the eye.
- Sections for Visual Breaks: Divide your board into sections: Vehicle Info, List of Specs, Awards, and Custom Details. This prevents overwhelming the viewer.
- Flow Matters: Ensure that viewers can naturally follow from one part of the board to the next without confusion.
Consider Using Digital Formats for Your Board
- LCD and LED Displays: For those who want an intriguing display board with more pizzazz, digital signage can be a great choice. You can include slideshows or video clips of your vehicle in action.
- Interactive Elements: Consider adding QR codes that link to more detailed photo albums, vehicle history, or even a YouTube video of your car.
Integrate Testimonials or Endorsements
- Owner’s Story: Share personal quotes or the vehicle’s journey. If your beloved vehicle has a unique story, like being passed down through generations, make sure visitors know it.
- Testimonials: Display testimonials from previous owners, restoration experts, or car clubs to add credibility. Quotes like “This is the cleanest example of a 1970 Charger we’ve seen” will resonate.
Add Personal Touches to Engage the Audience
- Handwritten Notes: Attach a handwritten note or printed story about why you love this car. It’s personal, and it’s what makes people connect with your story.
- Display Props: Use display props like a photo holder with nostalgic items like the car’s original keys or a small photo album showing its transformation.
Incorporate Branding Elements if Applicable
- Logo Placement: If you’re representing a club or a restoration business, include the logo. It’s subtle branding but makes your board look professional.
- Branded Colors: Use your brand’s colors in your board’s design. Consistency adds a polished and professional look.
Ensure Readability from a Distance
- Font Size: Use large fonts—minimum of 32pt for headers and 24pt for body text. This ensures your content is legible from afar.
- Contrast: Use colors with high contrast to make sure your text pops. Dark text on a light background (or vice versa) works best.
Utilize Colors That Complement Your Vehicle
- Match or Contrast: Either match your board’s colors to your car for a cohesive look, or use contrasting colors that will make the car and board stand out individually.
- Dynamic Colors: Use dynamic colors that catch the eye, but don’t overdo it. Your board shouldn’t overshadow the star of the show—your vehicle.
Prepare for Varying Lighting Conditions
- Display Lighting: Bring your own display lighting if the show doesn’t provide adequate lighting. Spotlights can make all the difference when showcasing your finished display.
- Anti-Glare Coating: Use anti-glare coatings on your display board, especially if it’s glossy. This helps keep everything readable regardless of sunlight or artificial lighting.
Organize Information Logically
- Header to Footer: Your board should guide the viewer from top to bottom, with the most important details—like the car’s make, model, and year—at the top.
- Subsections: Create subsections for engine specs, vehicle history, and unique features to make navigation intuitive.
Provide Contact Information and Social Media Links
- Connect with Potential Buyers: Include your contact info in a non-intrusive way. If people are interested, they should be able to reach you.
- QR Codes: Add a QR code that links to your social media or website. It’s a seamless way for attendees to learn more or contact you.
Include Any Awards or Recognitions
- Awards Section: Set aside a section for awards or recognitions your car has received. This lends credibility and tells attendees your car is more than just eye candy—it’s a winner.
- Display Stands for Trophies: If you’ve won any trophies, consider bringing them and setting them up on display stands next to your board.
Practice Your Pitch to Engage Visitors
- Rehearse a Quick Speech: Be ready to tell your vehicle’s story in a 60-second pitch. Know your vehicle’s history and cool details by heart.
- Interaction Tips: When people approach, engage them by asking if they have any questions. A simple “Would you like to know what makes this car special?” can go a long way.
Tips for Setup and Display on Show Day
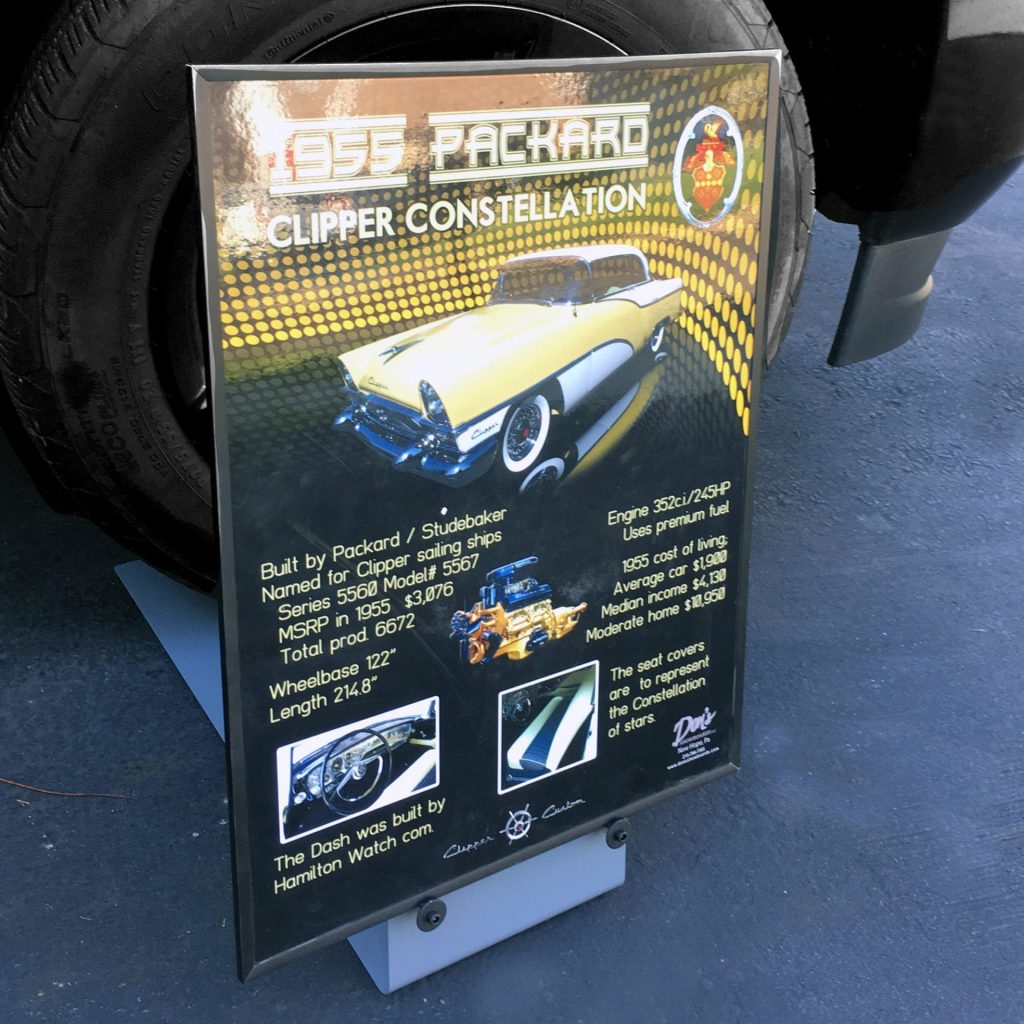
- Early Arrival: Get there early so you can set up without pressure. A rushed setup can lead to misplaced props and a poorly arranged board.
- Display Barriers: Use display barriers to ensure people don’t touch your car without permission—it keeps your expensive vehicles safe from accidental damage.
- Duty Display Check: Before the show starts, do a last-minute duty display check to make sure everything’s perfect—no crooked signs, smudged images, or missing props.
Engage with Attendees During the Show
- Make Eye Contact: People come to car shows not just for the cars, but for the stories. Make eye contact, smile, and don’t be afraid to start conversations.
- Handouts: Have some handouts or small sheets of paper with vehicle details, including your contact information, so people can take them home.
Follow Up with Potential Contacts Post-Event
- Reach Out: If anyone left their contact info or showed particular interest, don’t forget to follow up. A friendly email or social media message can make all the difference.
- Social Media Shout-Out: Post photos from the event and thank attendees on your social media channels. Tag anyone you spoke with and keep that connection alive.
Conclusion
Learning how to make a car show display board that turns heads isn’t just about putting up some specs—it’s about telling a story, catching the eye, and sparking conversations. Put some thought into each element, from materials to layout, and you’ll have an impactful display that does your car justice.
ALSO READ: How to Improve Car Acceleration
FAQs
A common size is 24×36 inches. It’s large enough to display details while being easy to handle.
Yes, digital screens like LCD displays are perfect for a high-tech touch, especially at bigger shows.
Absolutely! QR codes can link to more detailed information, making it easy for people to learn more about your vehicle.
Use high-quality images, clear language, and include personal stories or testimonials that connect emotionally with the audience.

